
Why is a fitting band important?
Like making a toile for a dress, a fitting band allows you to get the foundation right before cutting into that beautiful lace.
90% of the support for a bra comes from the band. If this doesn’t fit correctly, your finished bra isn’t going to either. Most importantly you’re not going to know if it’s the cups or the band that need to be adjusted. Believe me I know how much you want to just get on and make something special, but don’t miss this step, you’ll thank yourself in the long run.
Remember, every body is different, your bra needs to be comfortable for you, after all this is probably why you started out on this journey in the beginning.
It also really helps to use the fabrics, or type of fabrics that you will use in your final bra to make your fitting band. If you use different fabrics, the fit will inevitably be different. We sell a fitting band kit, that includes our usual sheer cup lining, powernet and elastics so that you can perfect the fit in the same fabrics as your final bra. If you find your fit is good and you’ve used wash away thread you can reuse the parts in your final bra, reducing waste and saving money.
Below is how I would go about getting a good fit on a new client for the first time.
Contents
Step 1 - What you'll need

The must haves:
- Your chosen pattern – you’ll use this as the basis for your fitting band
- Underwires
- Fitting band kit
- Fabric for your bridge and cradle such as sheer cup lining
- Powernet for the back band
- Strap elastic
- Bottom band elastic
- Underarm elastic
- Underwire channelling
- Hook and eye closure
- Rings and sliders to correspond to your strap elastic
- Optional – Wash away thread
- If you need to make adjustments:
- Tracing paper – ideally pattern tracing paper
- Pen / pencil and drafting rulers.
Step 2 - Sizing
You’ve already taken the time to get your best fitting wire and you’ve chosen a pattern. How do you choose a starting size?
Different patterns use different measurement systems and it’s important to measure yourself using the method recommended in the pattern instructions as your starting point.
The most common method will be to measure round your body with a flexible tape measure just underneath the bust, making sure your tape measure is level all the way around. You will find that some patterns use your underbust rounded to the nearest even number as your band size, however, you may be asked to add 4 or 5 inches to your measurement to find your band size.
Next measure around your body across the fullest part of your bust, now take the band measurement from this new measurement and you will have your cup size. 1″ = A, 2″ = B, 3″ = C and so on. The letters vary from country to country but as a general rule the US does not use double letters, so where a 5″ difference would be a DD in the UK it would be a E in the US.
Most patterns will also suggest a wire size to go with your size, for Instance a 34B would be a 34 wire – You will see instantly if your chosen wire size will work with the size they are suggesting.
In more recent years, using the Bottom Cup Depth (BCD), or the BCD plus Horizontal Hemisphere (HH) measurements have become very popular, and I’ve found that using this method works really well for me as I have a small frame for my volume. The BCD method was developed by Beverly Johnson for her Pin Up Girl pattern and uses the vertical measurement in inches from the wireline/ Inframammary fold to the apex – if this measurement is 4′” use the 4.0 frame and your rib cage measurement is your band size. LilyPaDesigns introduced the idea of also taking the HH measurement, this is taken from the wireline / IMF at the underarm to the wireline/ IMF of the centre front over the nipple and gives a better idea of volume distribution. The Rafale bra from Hari ito Lingerie and also the Exquisite bra from Afi Atelier are among some of the patterns that now also use this system.
Depending on your individual body you may find one method works better than another and as with all parts of bra making it involves a bit of trial and error. Take your measurements in the recommended way by the pattern you want to make and start with the size suggested, but check that it will work with your chosen wire!
Note
For for the remaining steps, I’m assuming your pattern is a full band bra. This is where the band runs under the cups as well as the bridge; and the frame is made up of a bridge and two cradle pieces. If you are making a partial band or your frame is just one pattern piece, you will have to adjust these steps slightly.
Step 3 - Bridge / Gore
If this is your first fitting band, there are a few things that will help you to get a great fit sooner.
- Take the time to look at the pattern pieces and analyse them against your own body shape.
- Check that the frame recommended for your measurements works with your wire size. Remember the pattern should work for your wire, not the other way around. If you find that the two are different, go with the frame that works with your wire and adjust the length of the back band.
Firstly we are going to take a look at the bridge piece (also referred to as the gore) of your chosen size, this is the part that sits between your breasts at the centre front. If your bridge is too wide or too narrow, your frame won’t sit nicely in the crease under your breast, your Inframammary Fold (IMF), and the bra is unlikely to be comfortable.

Cut the bridge out from a piece of card making sure to remove the seam allowance and try fitting this to your chest wall. You’ll be able to see if this follows the curve of your IMF.
If there is a visible gap between the card and your IMF cut the pattern piece down the middle and rotate the two halves apart until they fit snugly into your IMF and tape a scrap piece of card to it to secure it into this new shape.
If the bridge is sitting on your breast tissue overlap the two sides until it fits and again tape in place. You may find the bridge is too wide or narrow at the top, bottom or both.
Once you’ve made the necessary adjustments, make a new pattern piece and test it fits well to your IMF.
Step 4 - Frame
Next compare your underwire to the whole frame of your bra, this is made up of the side frames / cradle pieces and the bridge. These three pieces will be sewn together, with the channeling sewn along the resulting inside curve to hold your underwire. Check the overall frame by working your wire along the wire line to check if it will fit into the curve.
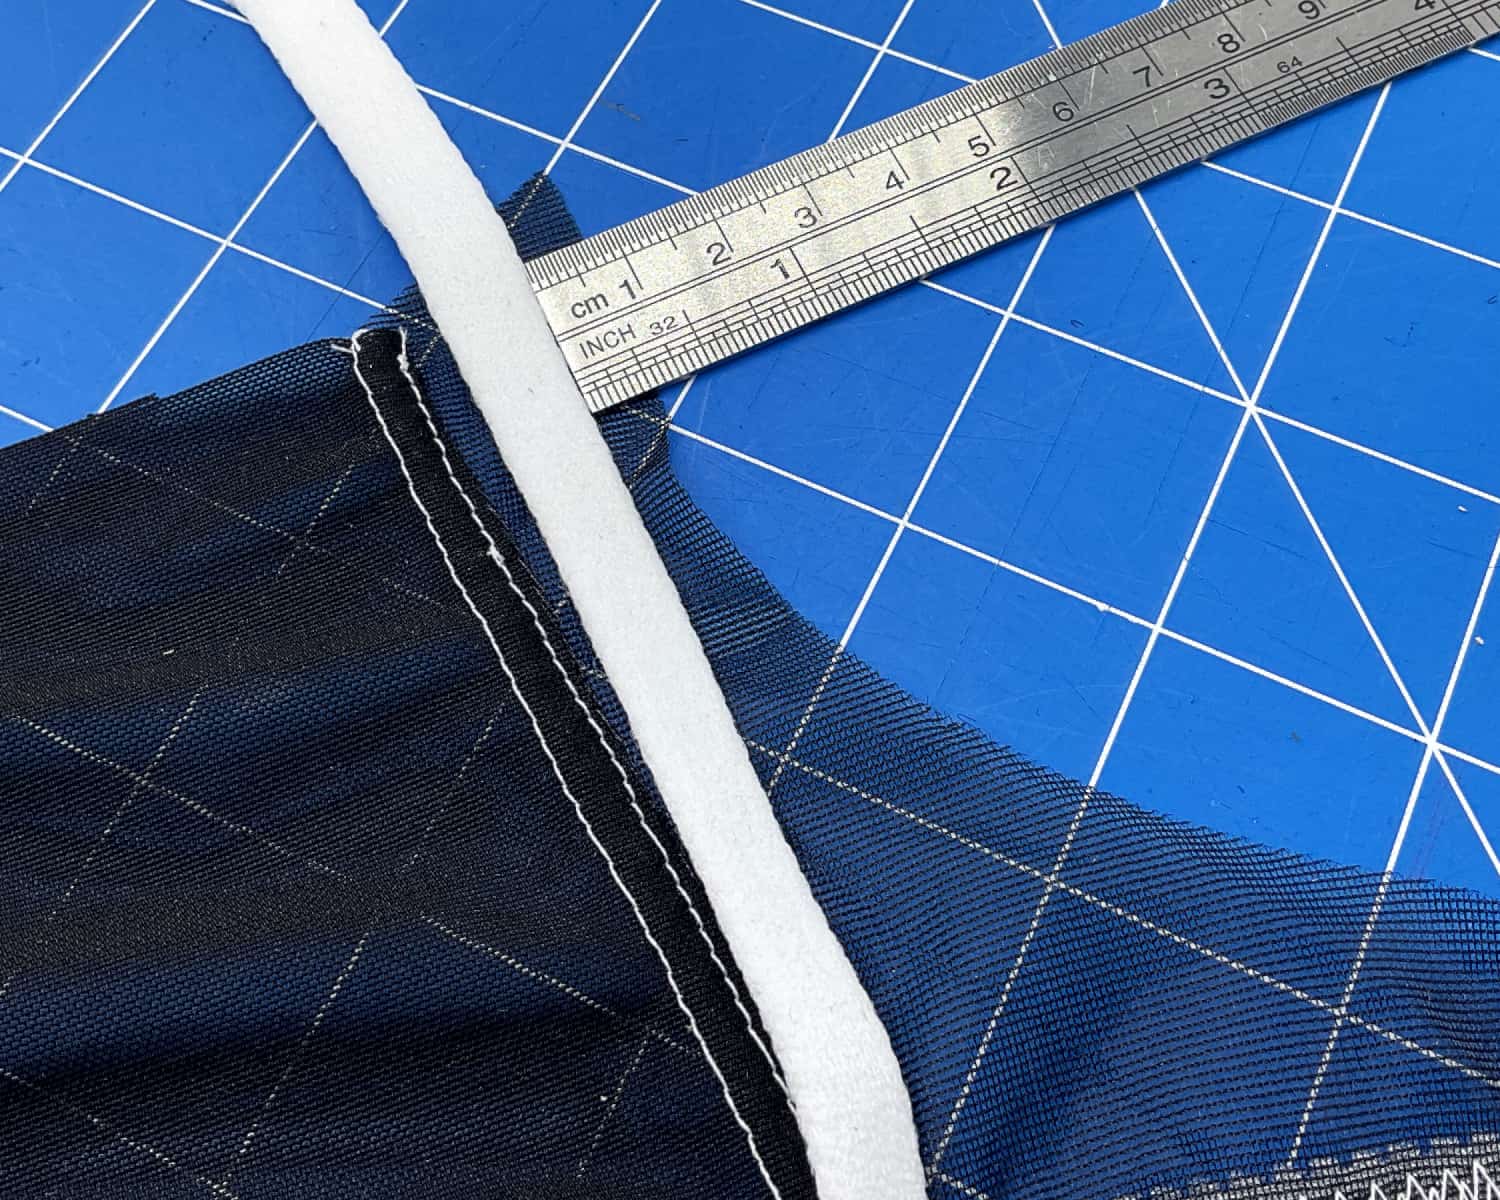
Remember, leave the recommended seam allowance at the top edge of both pattern pieces as well as 6mm or 1/4″ at both ends for wire play.
If your wire is too long for the pattern, increase the height at the centre front and/ or underarm. If its too short, decrease the height at one or both of these points. Whether you increase or decrease, you’ll need to adjust the height of the back band piece by the same amount, so that when you sew them together they fit nicely.

Step 5 - Back Band
So your wire looks like it works well with your frame, and you have made any necessary adjustments. If you have changed the frame to be smaller or larger, now’s a good time to check that the overall measurement of your bra will still fit around your rib cage. Check the length of the frame you are now using against the length of the original frame your measurements suggested. If its shorter, add onto your back band. If the frame is larger, reduce the back band.
Take into account that your powernet will stretch, whereas your sheer cup lining will not. So, if you need to add onto the back band, don’t add the full amount. You can estimate this from the percentage of stretch, but once again there is some trial and error to get a good fit! If in doubt, make your back band larger, you can always shorten your band.
Step 6 - Elastics and Hooks & Eyes
The final alteration to make to your pattern pieces before you start your first fitting band is to the seam allowances for your elastics and hooks & eyes. If your chosen pattern is designed for 12 mm elastic along the bottom band and you use 19mm, your band will be shallower than its designed to be, same goes for underarm elastics and straps. Take the time to adjust for your chosen elastics on each piece of the pattern that it will effect:
- The lower edge of the frame and back band for the bottom band elastic.
- The top edge of the back band, top of the cradle for the underarm elastic.
Lastly, does your hook and eye closure measure the same as the one suggested? if not, increase or decrease the height at the edge of the back band where it will attach.

Step 7 - Cutting out
Hooray! you have your pattern and you’re ready to cut out the pieces.
For the fitting band you will need the centre bridge, a left and right cradle piece and a left and right back band cut out of the fabric your pattern suggests.
Make sure to take note of the Direction Of Greatest Stretch (DOGS) of your pattern and fabrics.
I find using a cutting mat and rotary cutter gives me the best finish.

Step 8 - Construction

You’re now going to follow the pattern instructions up to the point where you would sew in the cups, you’re not going to need these yet.
To avoid wasted time with the seam ripper, I discovered wash away thread a few years ago and it’s made sewing fitting bands so much quicker!
You use it as either your bobbin thread or regular thread in the needle. When your done, simply put the fitting band in warm water and your threads will dissolve and you can use your materials again, once they’ve dried out!
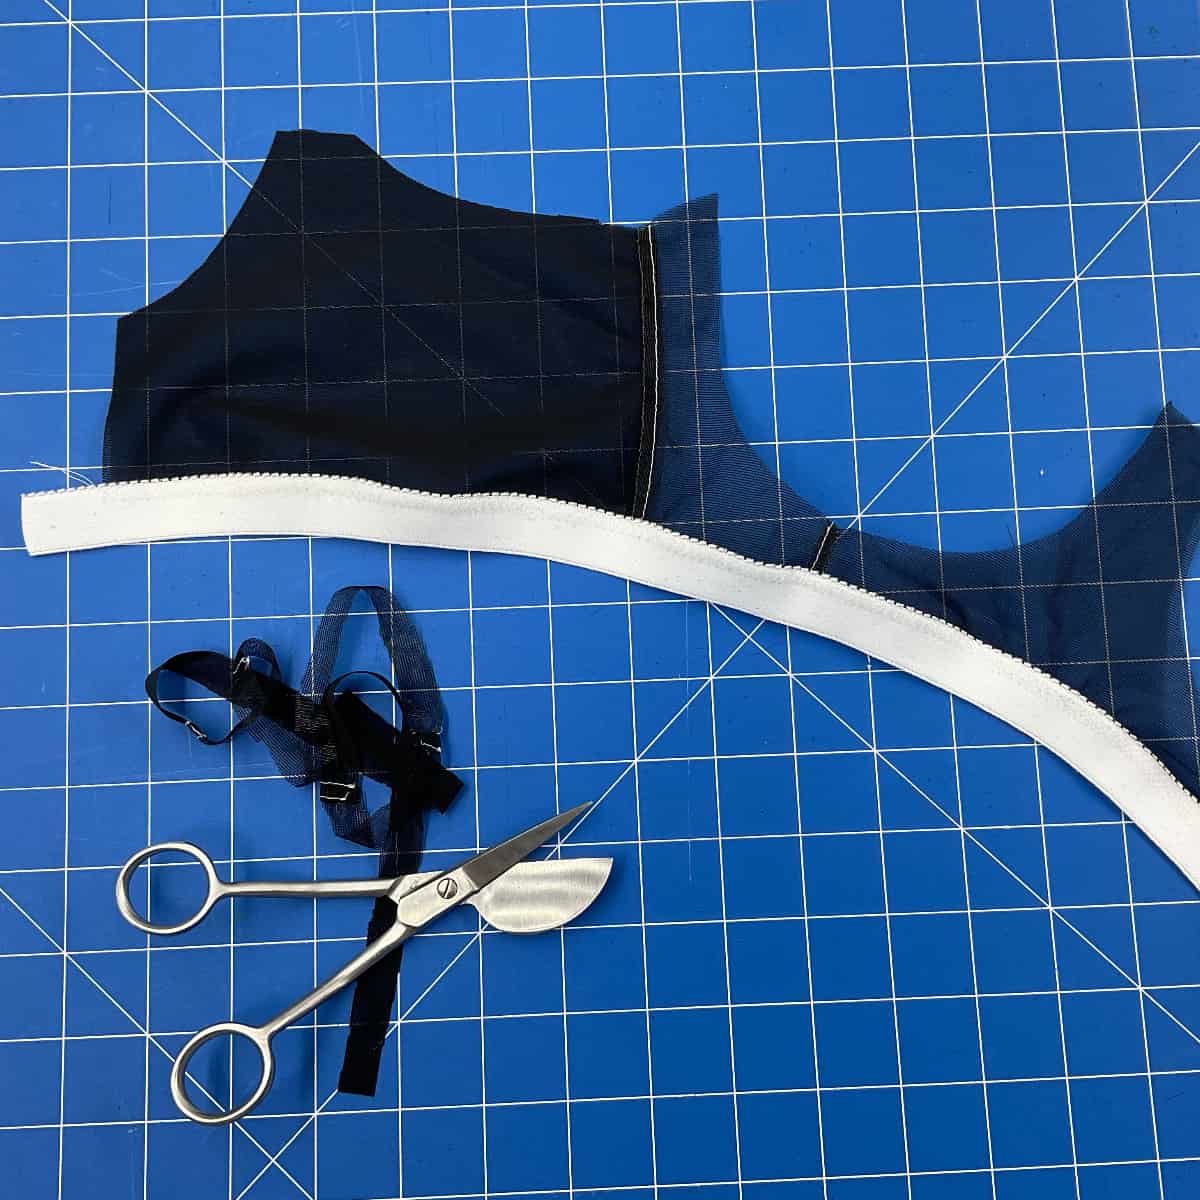
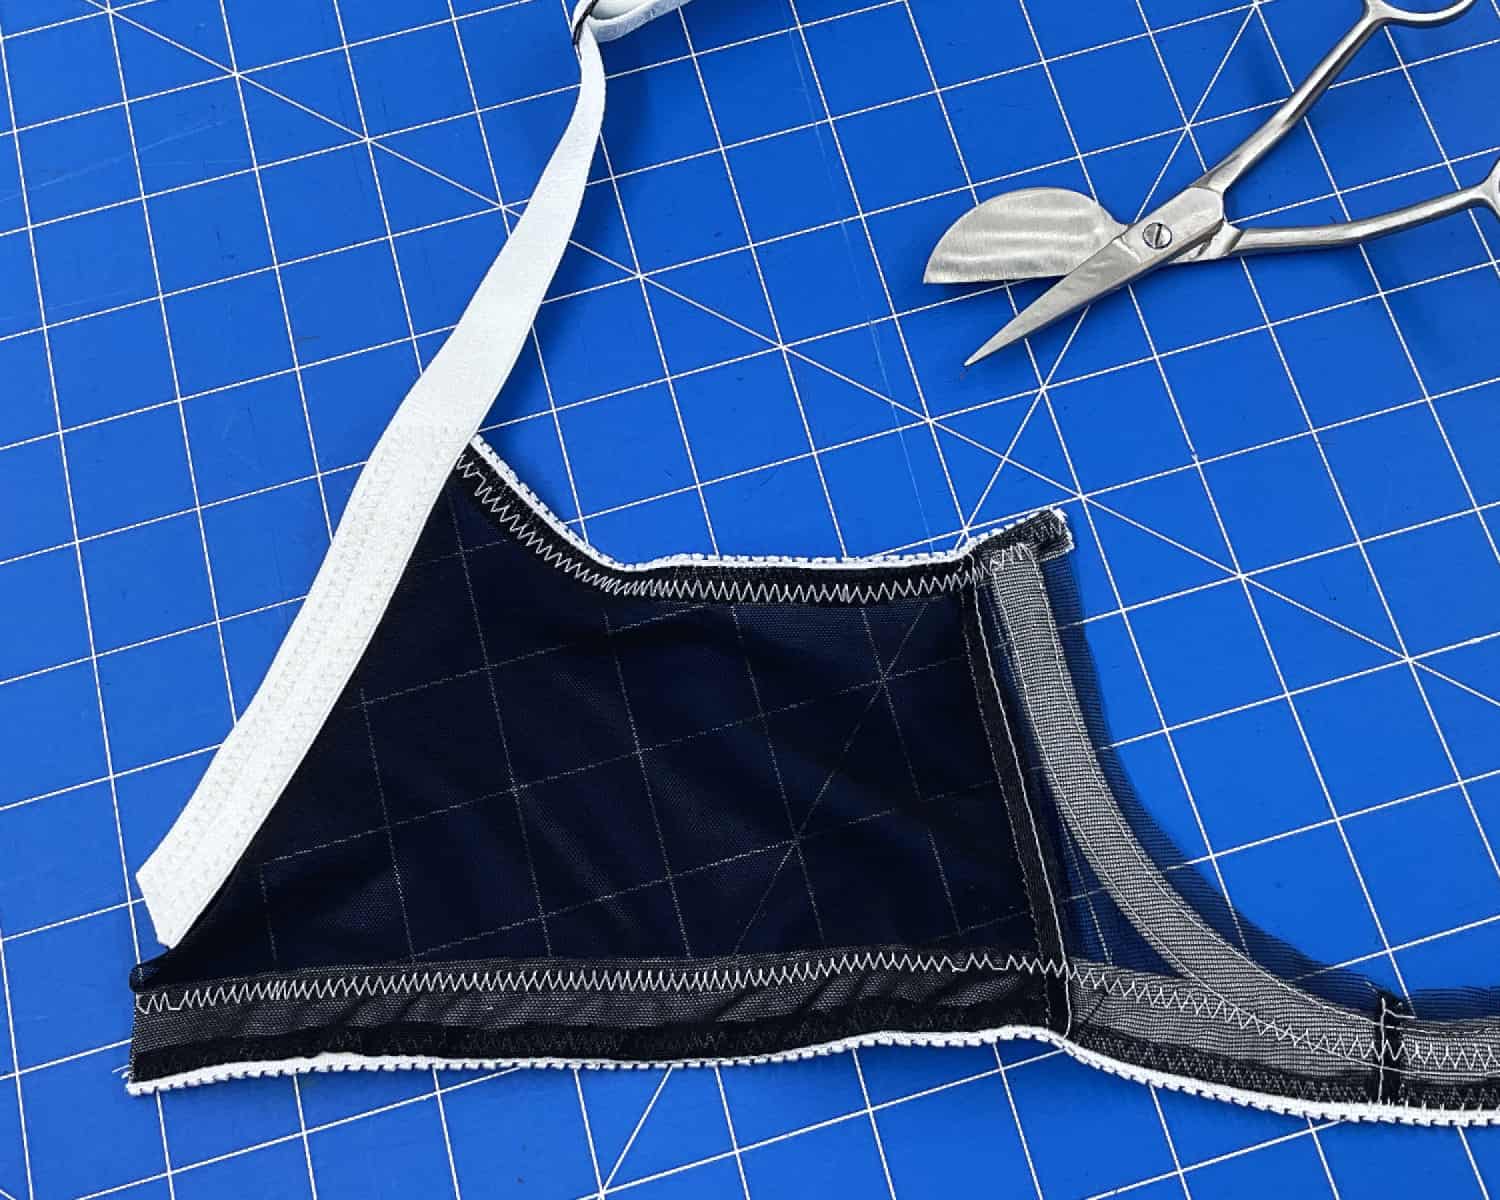
Sew the two cradle pieces, the bridge and back band together as instructed, then make the first pass of the bottom band elastic along the bottom edge of the frame all the way along.
Now sew on the underwire channeling along the curve where your cup would normally be sewn in, leaving the seam allowance distance in from the curve. You will use the seam allowance later to sew in your trial cups once the band is fitting well.
Sew the channeling all the way around the curve, starting just after the seam allowance at the bridge to just before the elastic allowance at the underarm.
Top stitch the channeling down from the front, and then make the second pass of the bottom band elastic.
Sew the underarm elastic along the top of the band from where the hook and eye will attach to the point where the cup will attach.
Depending on your chosen pattern, attach the straps to the back band as instructed, leaving them loose at the front to attach to the trial cups later.
Finally sew on the hooks and eyes.
Congratulations, you have your first fitting band. Now it’s time to try out some cups!


Lets just go over the key points:
- Always measure yourself following the pattern instructions, but also keep in mind that you took the time to get your wire just right and you may need a different frame size that the one recommended. Your pattern should fit the wire, not the other way around.
- Check the main pattern pieces to see how they work with your body shape, don’t be afraid to make some simple adjustments to the bridge – it’s amazing how much this small pattern piece effects the fit.
- Your fitting band is just that a fitting tool, it’s not a finished bra so don’t worry about the finish quality!
- Take your time and enjoy the process – and most importantly, be patient!